> ## Documentation Index
> Fetch the complete documentation index at: https://developer.zamp.com/llms.txt
> Use this file to discover all available pages before exploring further.
# Installation Guide
> Learn to install Zamp directly onto your WooCommerce store.
# Overview
Zamp can handle tax calculations on any orders in your WooCommerce store, and manual calculations in WooCommerce Admin. The installation process is quick and easy.
# Prerequesites
| **Item** | **Where to Obtain** |
| :------------------------------------------ | :------------------------------------------------------------------------------ |
| WordPress 5.0+ | Verify your WordPress version within **WooCommerce > Status** |
| Your Zamp API Key for Sandbox or Production | The **Integrations** page within your Zamp account, or your Zamp representative |
| WooCommerce 7.0+ | Verify your WooCommerce version within **WooCommerce > Status** |
| PHP 7.4+ | Verify your PHP version within your **Server environment** |
# Installation Process
## Installing the Plugin
* See this
* Download the plugin locally.
Ensure you have access to your admin dashboard for the WooCommerce store.
1. Navigate to **Plugins**
2. Click **Add New**
3. Click **Upload Plugin**
4. Select the **Zamp Tax** plugin ZIP file
5. Click **Install Now**
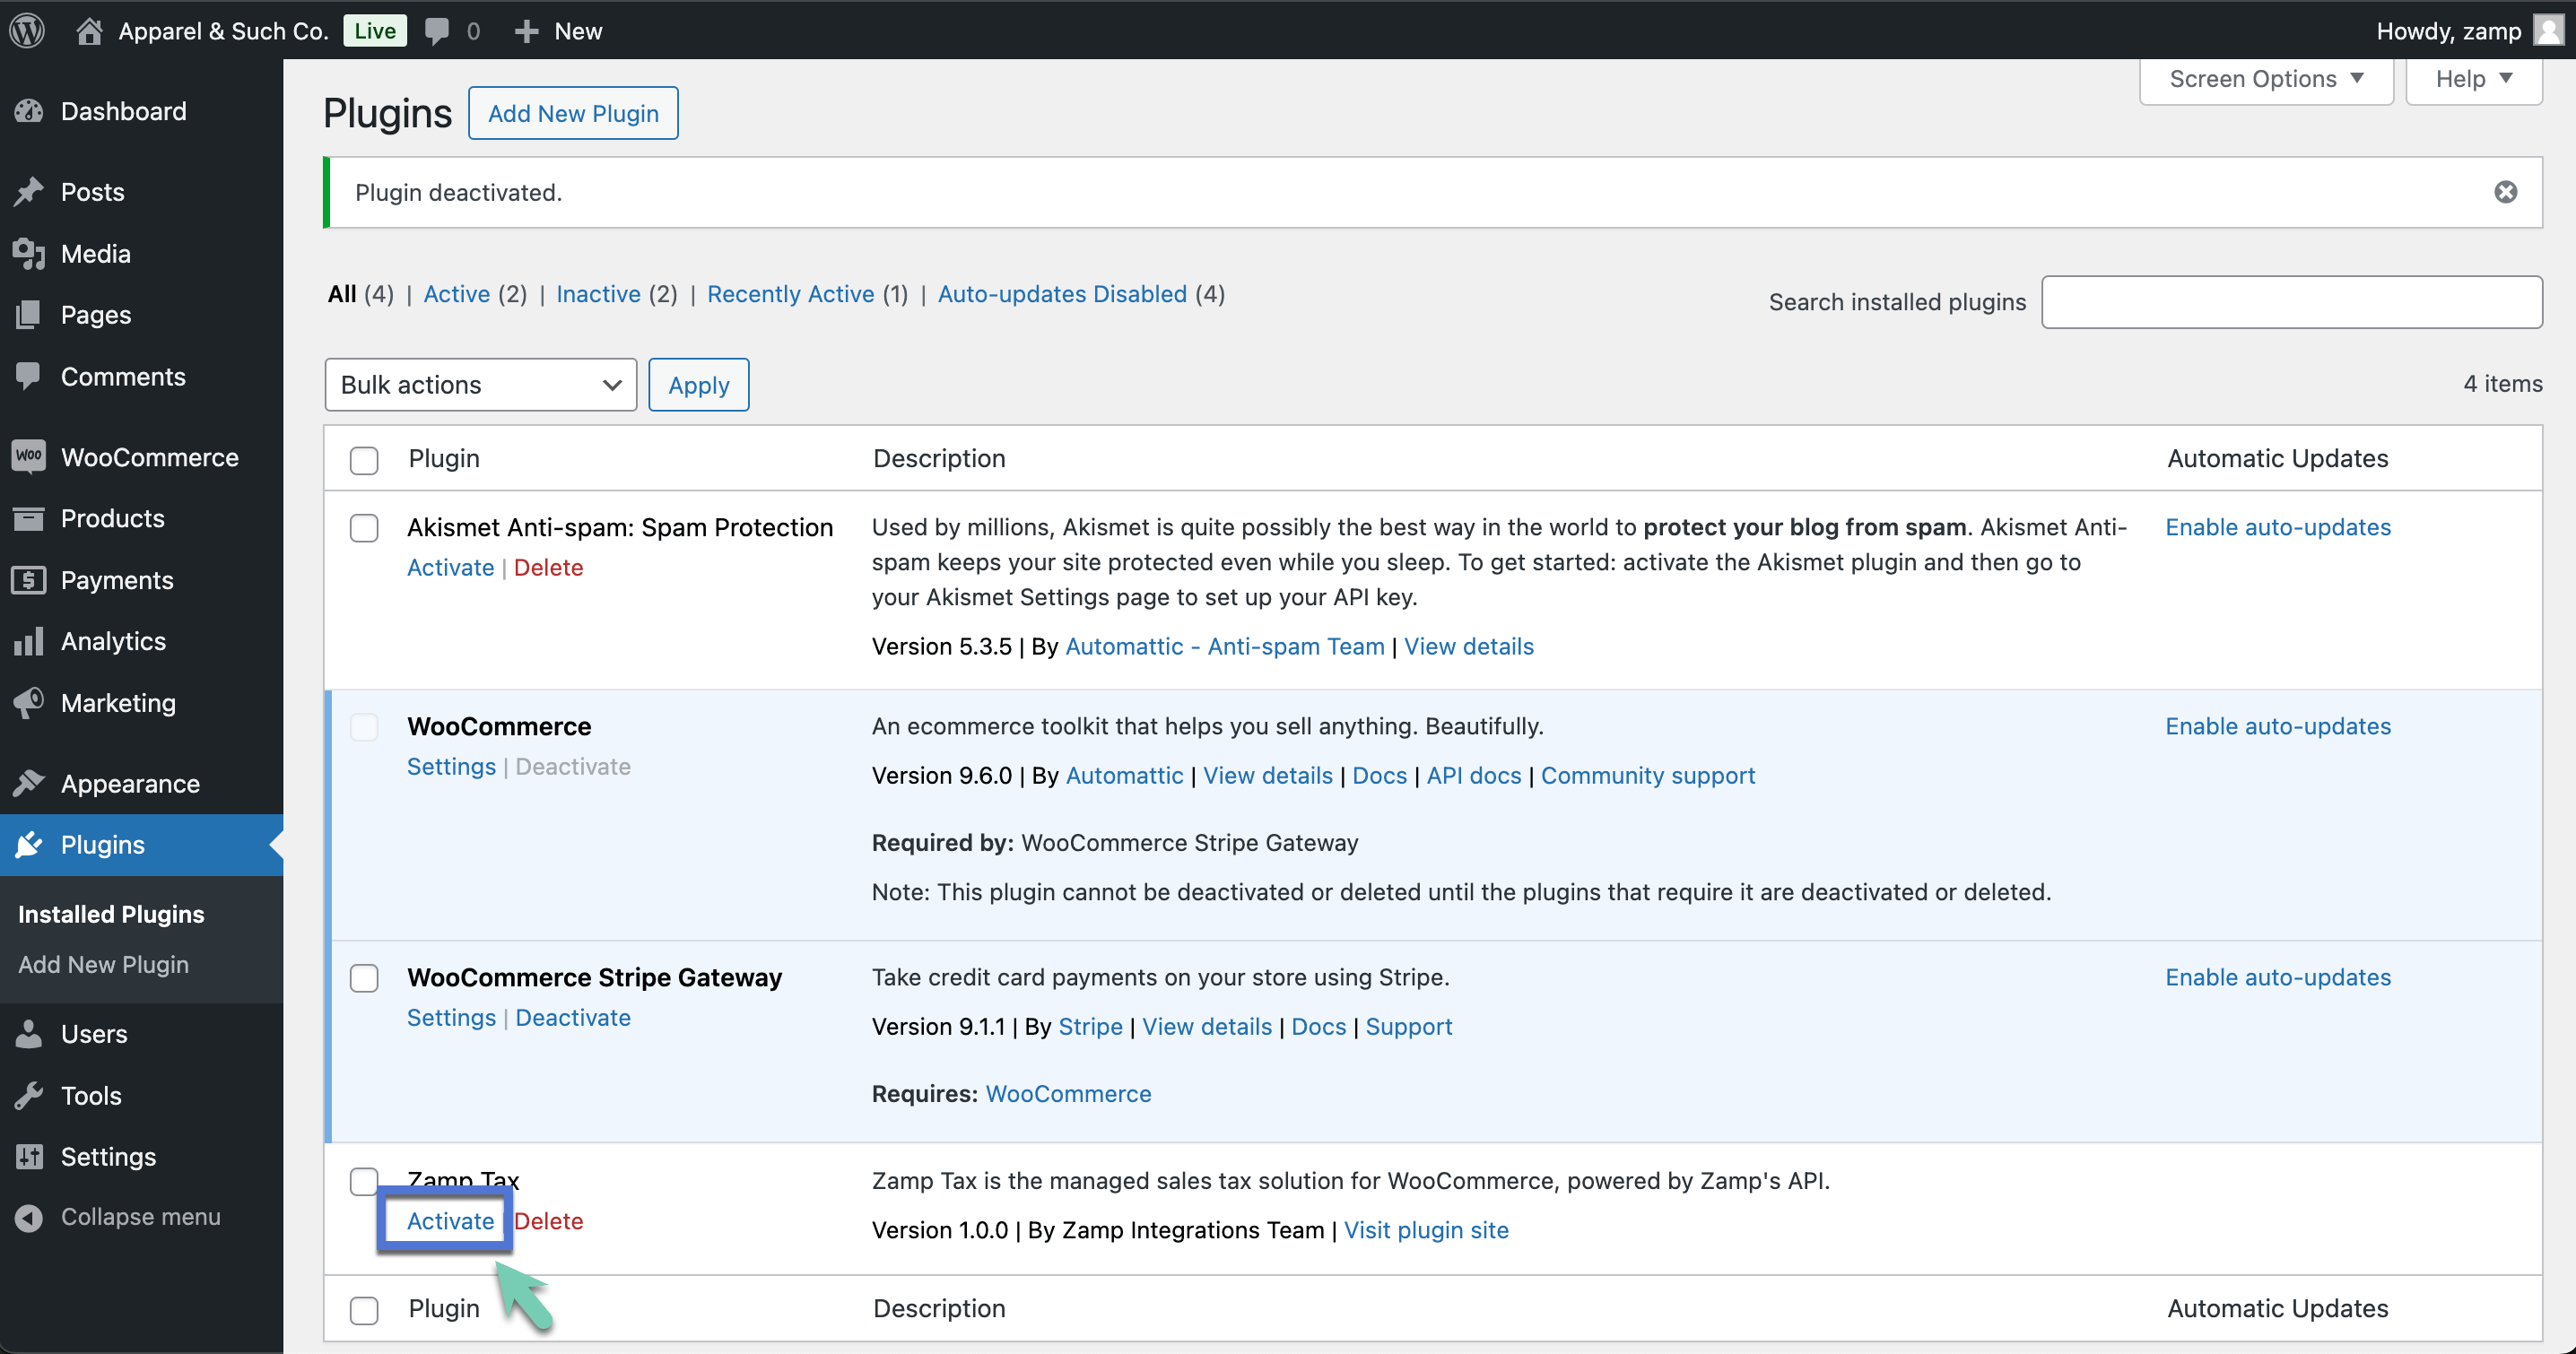
6. Find **Zamp Tax** on the list, and click **Activate Plugin**
 ## Initial Configuration
1. Hover over\*\* Plugins\*\* and click **Installed Plugins**
2. Find **Zamp Tax for WooCommerce** and click **Settings**
1. Under **API Token**, enter your Zamp API token
2. Click **Save Changes**
3. Ensure the\*\* Zamp Token Status\*\* is **Connected**
## Initial Configuration
1. Hover over\*\* Plugins\*\* and click **Installed Plugins**
2. Find **Zamp Tax for WooCommerce** and click **Settings**
1. Under **API Token**, enter your Zamp API token
2. Click **Save Changes**
3. Ensure the\*\* Zamp Token Status\*\* is **Connected**
 1. **Enable sales tax calculations**
1. Check this box if Zamp is handling calculations via the Zamp Tax Engine
2. **Refresh Tax Codes**
1. Click this button to pull in the list of Zamp Tax Codes. The same codes listed under the [Zamp Tax Codes](/api-reference/tax-codes) section.
3. **Default Product Tax Code**
1. The default code is the "General Tangible Personal Property" code. If your default taxability is a different code, you can configure your own default tax code.
4. **Enable transaction sync**
1. Check this box if you want to post transactions to your Zamp account.
5. **Send transactions when order status is processing**
1. You will have the option of either pushing transactions to Zamp when they are in the **Processing** status, or after it has been marked as **Completed**.
6. **Enable address validation**
1. Check this box if you would like to leverage Zamp's integration to Smarty, a third party address validation service.
7. **Enable transaction sync recalculate**
1. Only applicable for historical sync functionality. If checked, Zamp will recalculate tax on your historical transactions when pushed to Zamp. **This is an optional setting**.
8. **Enable debug logging**
1. Highly recommended that this box is checked, for scenarios where Zamp is assisting with troubleshooting.
9. Click **Save changes**
Under **WooCommerce > Settings > General**, confirm that your store's address is correct, and this information may be used in origin-based tax scenarios.
1. **Enable sales tax calculations**
1. Check this box if Zamp is handling calculations via the Zamp Tax Engine
2. **Refresh Tax Codes**
1. Click this button to pull in the list of Zamp Tax Codes. The same codes listed under the [Zamp Tax Codes](/api-reference/tax-codes) section.
3. **Default Product Tax Code**
1. The default code is the "General Tangible Personal Property" code. If your default taxability is a different code, you can configure your own default tax code.
4. **Enable transaction sync**
1. Check this box if you want to post transactions to your Zamp account.
5. **Send transactions when order status is processing**
1. You will have the option of either pushing transactions to Zamp when they are in the **Processing** status, or after it has been marked as **Completed**.
6. **Enable address validation**
1. Check this box if you would like to leverage Zamp's integration to Smarty, a third party address validation service.
7. **Enable transaction sync recalculate**
1. Only applicable for historical sync functionality. If checked, Zamp will recalculate tax on your historical transactions when pushed to Zamp. **This is an optional setting**.
8. **Enable debug logging**
1. Highly recommended that this box is checked, for scenarios where Zamp is assisting with troubleshooting.
9. Click **Save changes**
Under **WooCommerce > Settings > General**, confirm that your store's address is correct, and this information may be used in origin-based tax scenarios.