> ## Documentation Index
> Fetch the complete documentation index at: https://developer.zamp.com/llms.txt
> Use this file to discover all available pages before exploring further.
# Installation Guide
> Learn how to download and configure the Zamp Tax plugin for your Shopware store.
# Overview
Zamp offers a fully certified sales tax solution for your Shopware storefront. Easily download and install the plugin using this guide.
# Prerequisites
| **Item** | Where to Obtain |
| ------------------------------------ | ---------------------------------------------------------------------------------------------------------------------- |
| A Zamp Sandbox or Production API Key | Either the **Integrations** page on [**app.zamp.com**](http://app.zamp.com), or directly from your Zamp Representative |
| Shopware Version 6.7 and above | In Shopware admin, the store version will appear in the top-left |
| PHP Version 7.4 or higher | Run `php -v `from the server or container where the store is hosted |
# Installation Process
1. In your Shopware account, hover over **Extensions**
2. Click **Store**
3. In the search bar, look for **Zamp**
1.
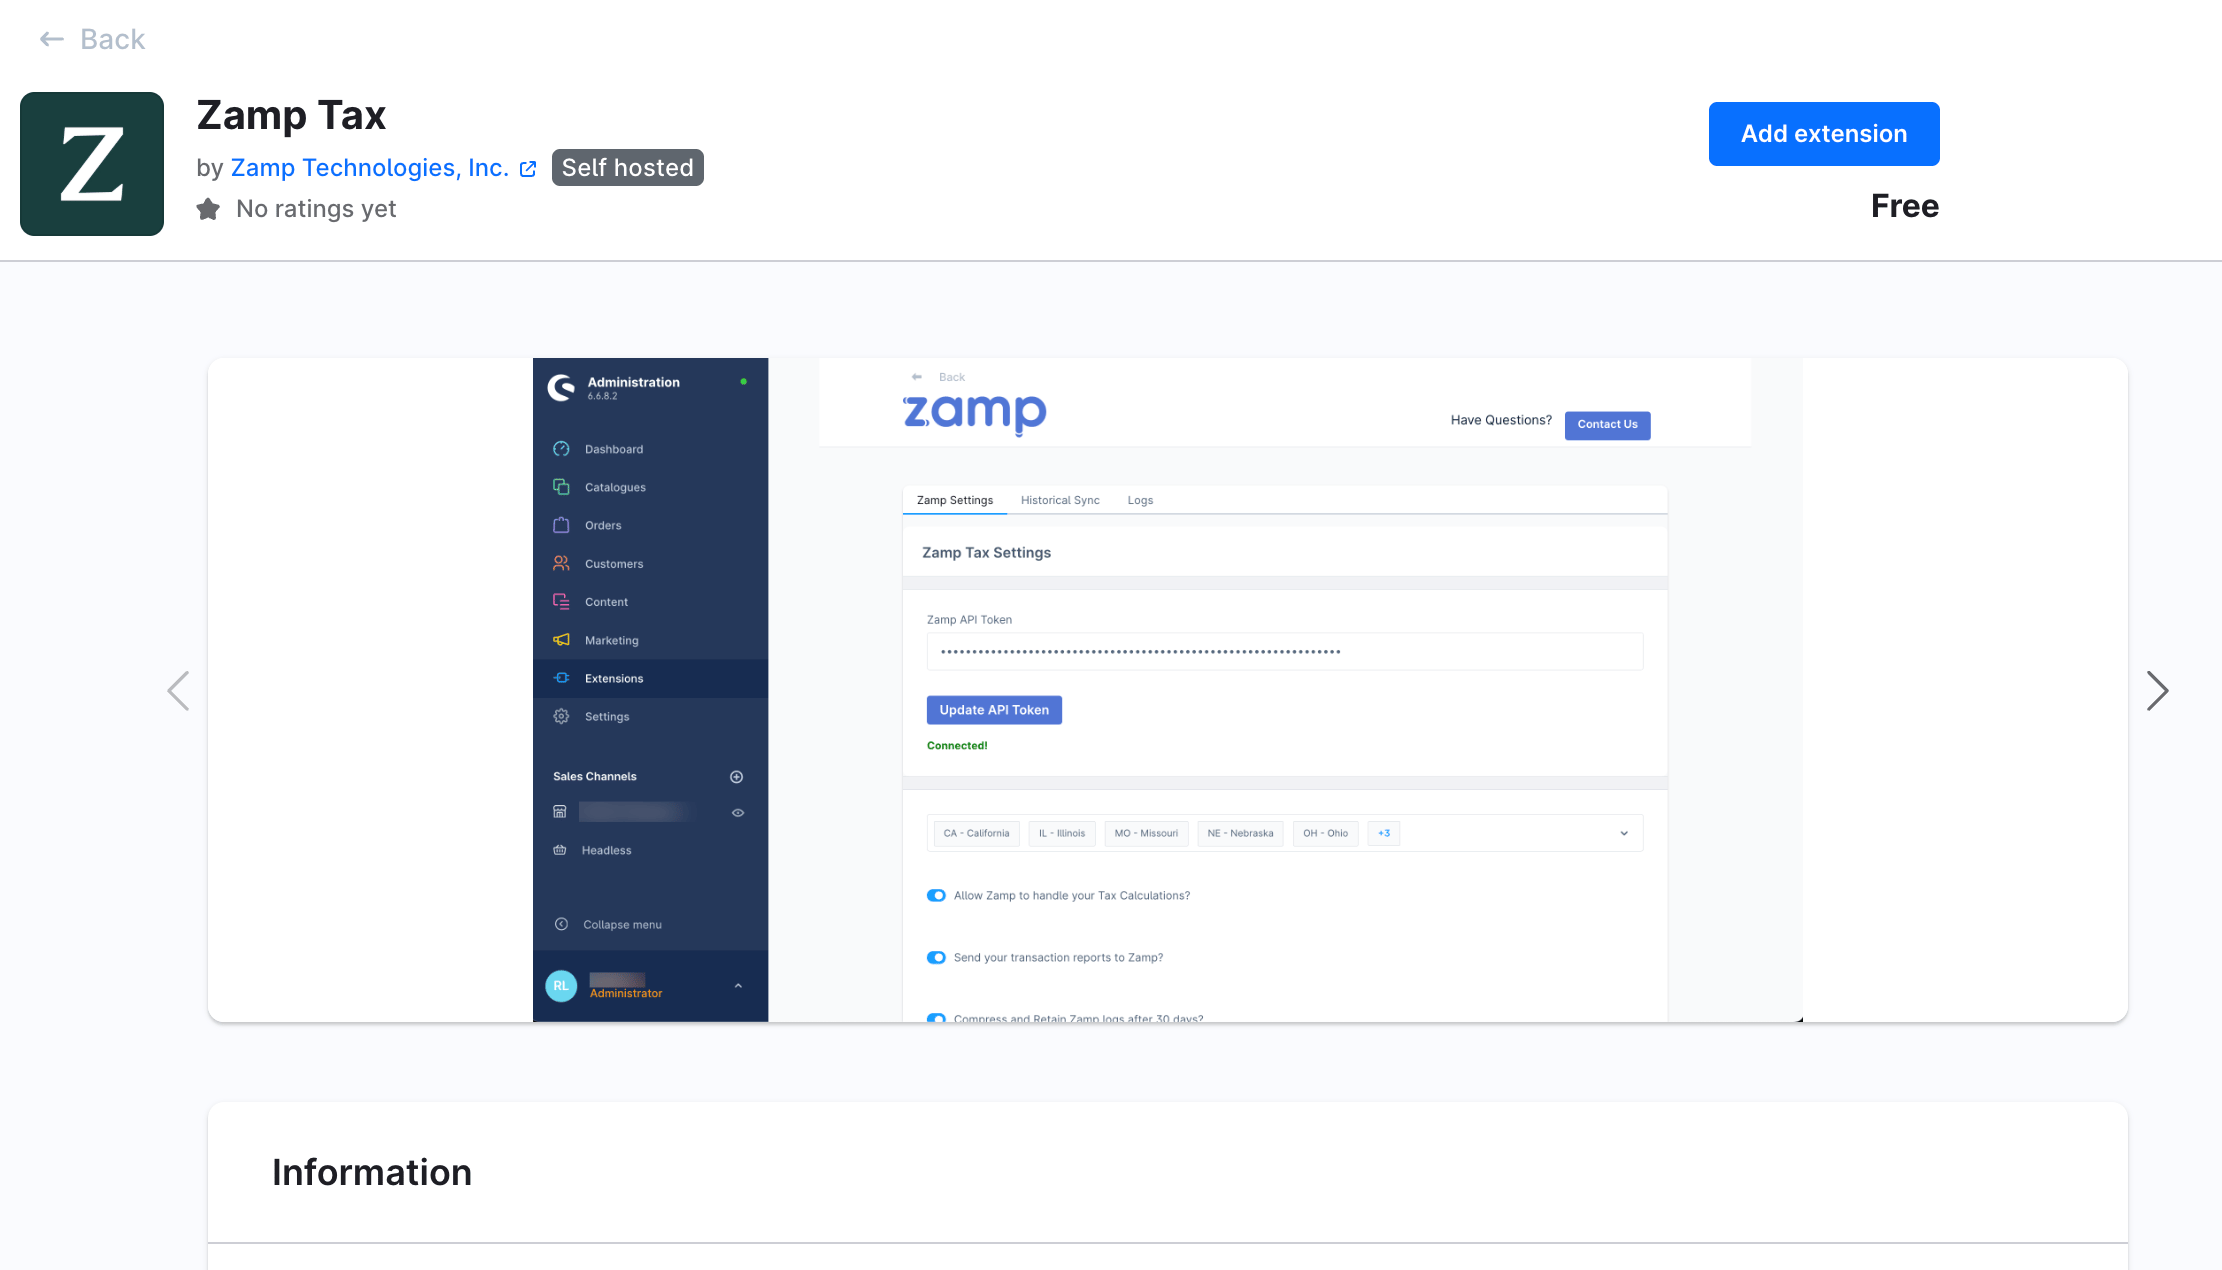 4. Click **Add Extension**
1. Open **Zamp Tax.**
2. Enter your API Key into the **Zamp API Token** box.
3. Click **Save**, and green **Connected!** text should appear.
1.
4. Click **Add Extension**
1. Open **Zamp Tax.**
2. Enter your API Key into the **Zamp API Token** box.
3. Click **Save**, and green **Connected!** text should appear.
1.
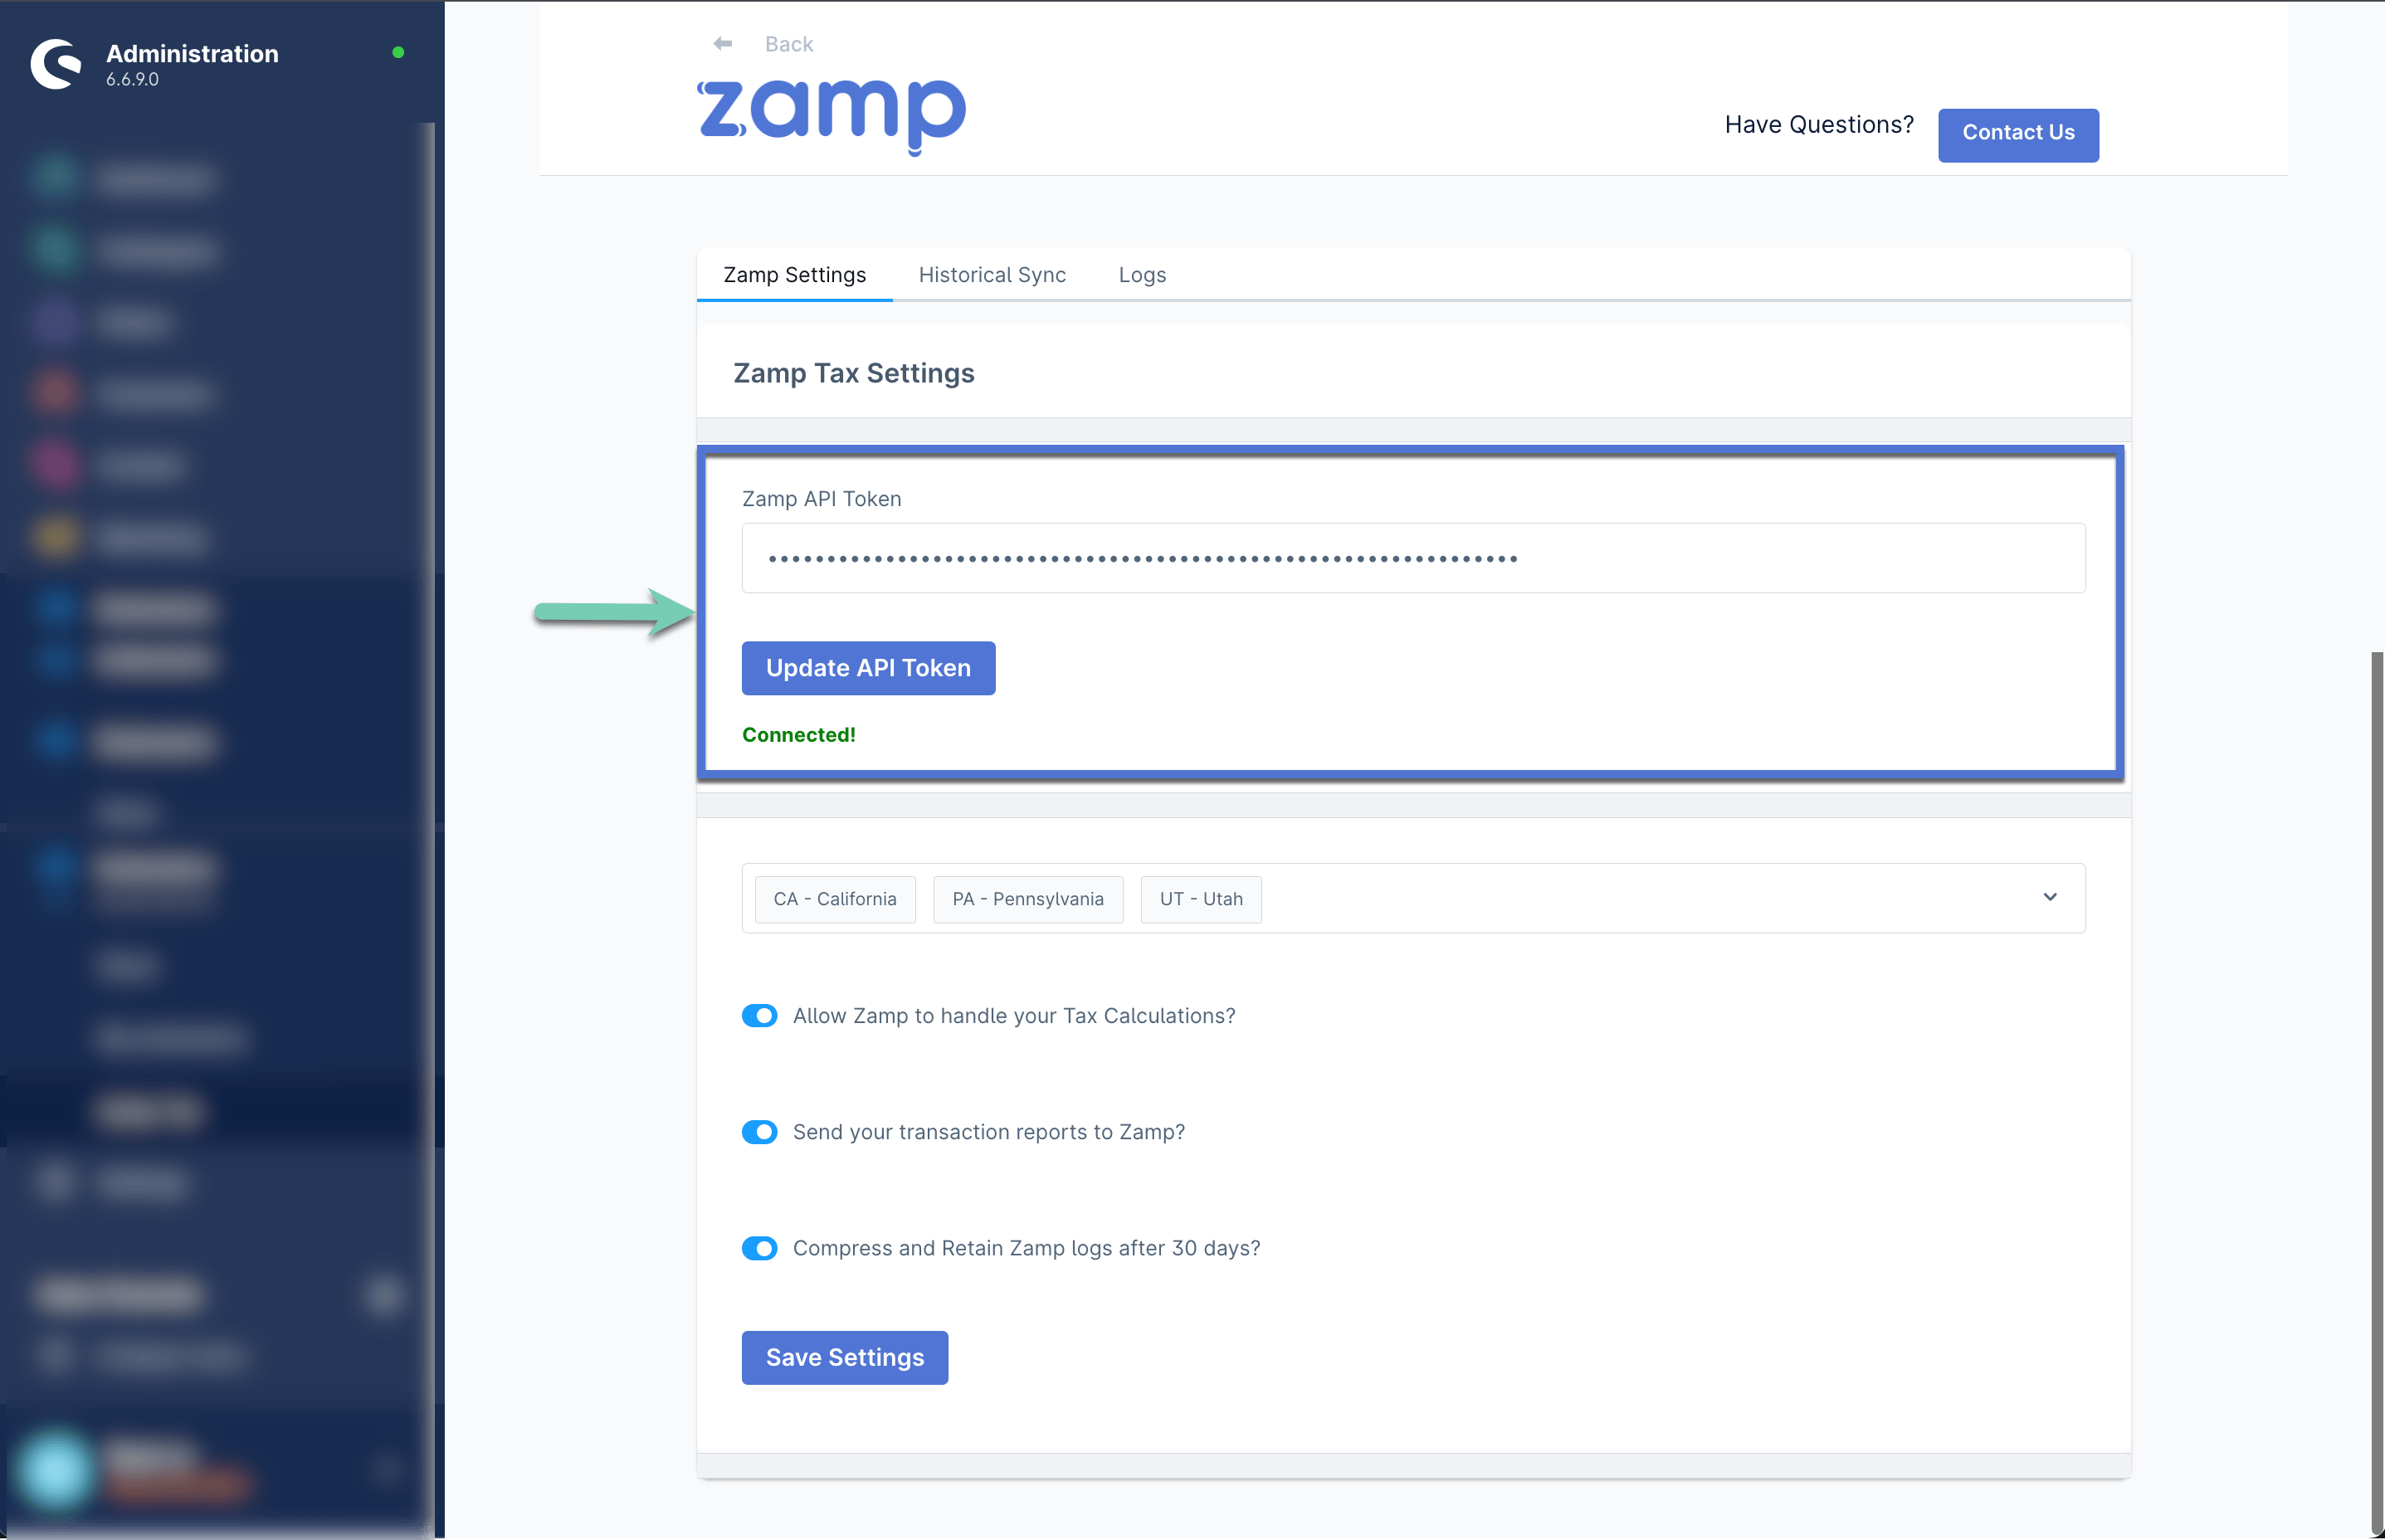 4. Under **Sales Channel**, either select a specific sales channel you will need Zamp calculations and transaction posting for.
1. **Note:** Leaving this blank will default to all available sales channels.
5. Enable either one or both of the below settings:
1. **Allow Zamp to handle your Tax Calculations?**
2. **Send your transaction reports to Zamp?**
6. Click **Save Settings**.
1. On the left-hand side, click **Settings**.
2. Under **Localisation**, click **Tax**.
3. Under **Tax provider**, toggle **Zamp Tax** to active.
You have now successfully installed Zamp on your Shopware account. See the [Shopware Support Guides](https://support.zamp.com/en/collections/19657672-shopware) for details on how to map exemptions and products.
4. Under **Sales Channel**, either select a specific sales channel you will need Zamp calculations and transaction posting for.
1. **Note:** Leaving this blank will default to all available sales channels.
5. Enable either one or both of the below settings:
1. **Allow Zamp to handle your Tax Calculations?**
2. **Send your transaction reports to Zamp?**
6. Click **Save Settings**.
1. On the left-hand side, click **Settings**.
2. Under **Localisation**, click **Tax**.
3. Under **Tax provider**, toggle **Zamp Tax** to active.
You have now successfully installed Zamp on your Shopware account. See the [Shopware Support Guides](https://support.zamp.com/en/collections/19657672-shopware) for details on how to map exemptions and products.